No edit summary |
No edit summary Tag: Visual edit |
||
| (63 intermediate revisions by 24 users not shown) | |||
| Line 1: | Line 1: | ||
{{InfoboxMission |
{{InfoboxMission |
||
| − | |image = |
+ | |image = <gallery> |
| + | Nightcall MISSION STILL.png|HITMAN™ 2 / III |
||
| + | Nightcall Old.png|Beta |
||
| + | </gallery> |
||
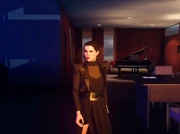
|target = [[Alma Reynard]] |
|target = [[Alma Reynard]] |
||
| − | |location = [[Hawke's Bay]], New Zealand |
+ | |location = [[Hawke's Bay]], [[New Zealand]] 🇳🇿 |
| + | |pre = [[Situs Inversus]] |
||
| − | |pre = *[[Hitman Timeline#Events of HITMAN™|Events of HITMAN™]] (Chronologically) |
||
|su = [[The Finish Line]] |
|su = [[The Finish Line]] |
||
| − | |game = |
+ | |game = {{HITMAN2018}}<br />{{HITMAN2021}} |
| + | |vip = N/A|client = [[Providence]]|date=May 2020}}[[File:Icon-Mission.png|alt=|left|frameless|60x60px]] |
||
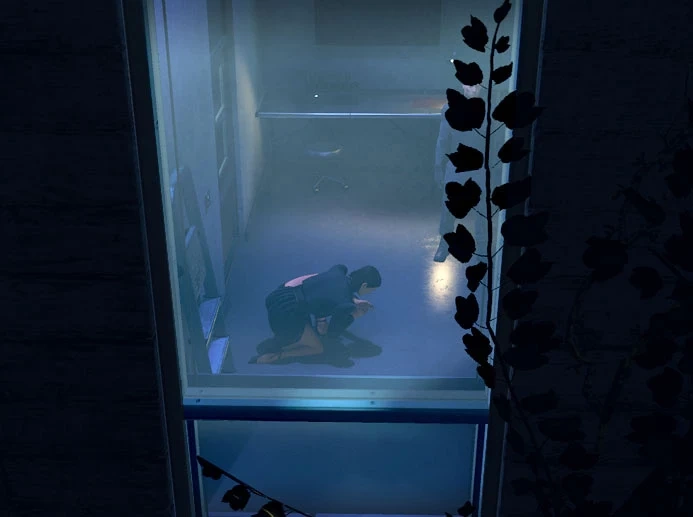
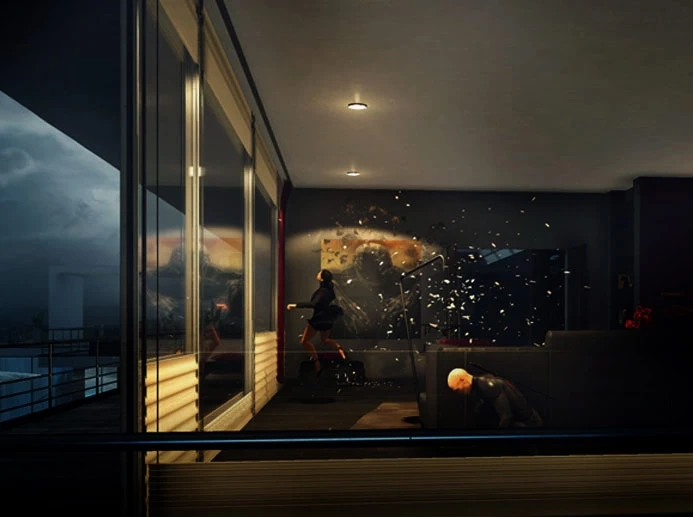
| − | |vip = N/A|client = [[Providence]]}}'''Nightcall''' is the first mission in ''[[HITMAN™ 2]]''. The game begins with Agent 47 sent by boat to [[Hawke's Bay]], New Zealand, to infiltrate the house of one of the [[Shadow Client|Shadow Client's]] top lieutenants for intel on his identity or whereabouts. The map consists of a single lavishly appointed beach house overlooking an isolated, windswept shoreline. |
||
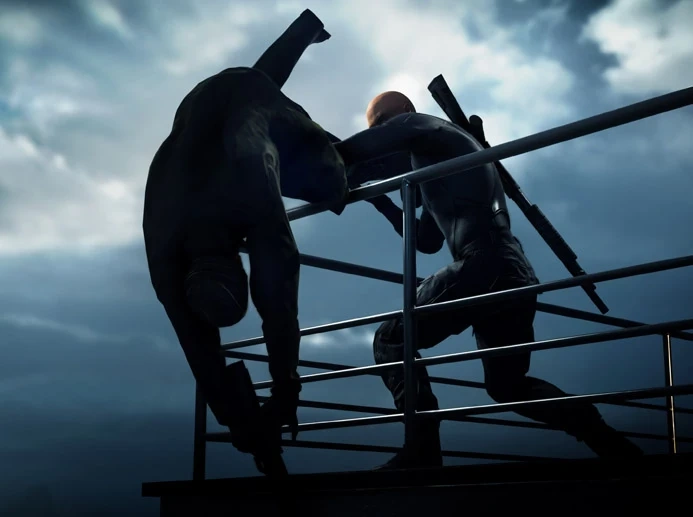
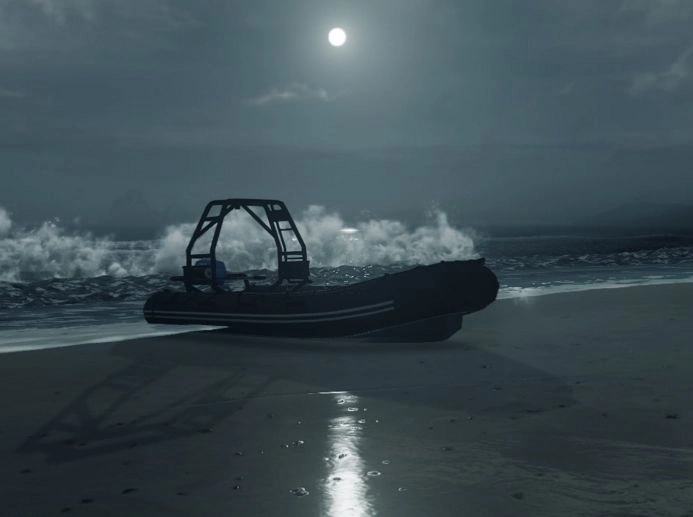
| + | '''Nightcall''' is the prologue and first mission in ''[[HITMAN™ 2]]''. The game begins with Agent 47 sent by boat to [[Hawke's Bay]], [[New Zealand]], to infiltrate the house of one of the [[Shadow Client|Shadow Client's]] top lieutenants for intel on his identity or whereabouts. The map consists of a single lavishly appointed beach house overlooking an isolated, windswept shoreline. |
||
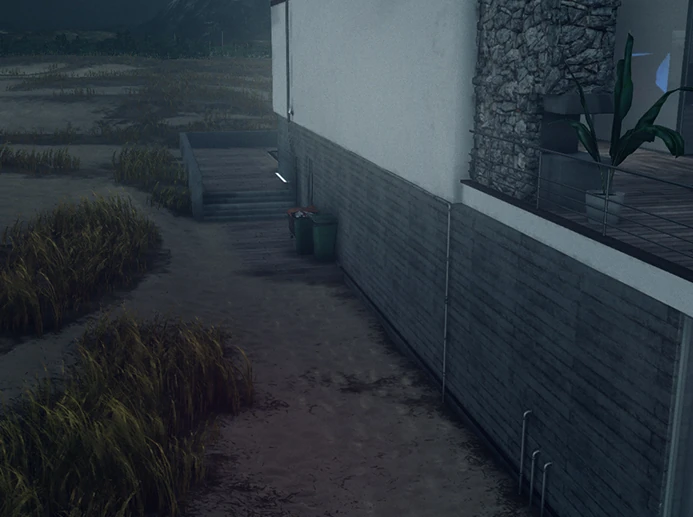
As this level functions as a tutorial for new players, demonstrating the controls and mechanics of the game, it initially contains no enemies. Hostile NPC's arrive only after the player successfully accesses the office computer. While numerous, they are relatively easy to evade once outside the house, due to the low-light conditions and plentiful cover. |
As this level functions as a tutorial for new players, demonstrating the controls and mechanics of the game, it initially contains no enemies. Hostile NPC's arrive only after the player successfully accesses the office computer. While numerous, they are relatively easy to evade once outside the house, due to the low-light conditions and plentiful cover. |
||
| + | {{Tabber - Mission|Cinematic Name=Nightcall|Briefing Transcript=''Greetings, 47. The [[ICA]] Board has accepted [[Providence]]'s contract; eliminate the [[Shadow Client]] and neutralize his militia. |
||
| − | '''Objectives:''' |
||
| − | *Find a way into the house |
||
| − | *Search the house for intel on the Shadow Client |
||
| − | *Eliminate [[Alma Reynard]] |
||
| − | *Locate Exit |
||
| + | ''|Briefing Cont=''Examining the intel you acquired in [[Colorado]], our analysts have managed to track down a key member of the militia; [[Alma Reynard]], a gifted field infiltrator, former eco-terrorist and girlfriend of the late [[Sean Rose]].'' |
||
| − | ==Mission Briefing== |
||
| − | ---- |
||
| + | ''Reynard's cell has already carried out a number of attacks on members of the global elite whom we assume were Providence operatives. She and her new partner, a former [[CICADA]] mercenary by the name of [[Orson Mills]], are laying low in a remote beach house in [[Hawke's Bay]], [[New Zealand]] - no doubt planning the militia's next attack.'' |
||
| − | {{BigQuoteCollapse|''"Greetings 47. The ICA Board has accepted Providence's contract; eliminate the Shadow Client and neutralize his militia. |
||
| − | '' |In-Game Briefing|1.1 = ''Examining the intel you acquired in Colorado, our analysts have managed to track down a key member of the militia; Alma Reynard, a gifted field infiltrator, former eco-terrorist and girlfriend of the late Sean Rose.'' |
||
| + | ''Reynard is undoubtedly high on the client's target list, but for now it is information that we seek. So, infiltrate the house and get us a lead on the shadow client.''|Target 1=Eliminate [[Alma Reynard]]|Objective 1=[[Alma's House|Find a way into the house]]|Objective 2=[[Shadow Client Intel|Search the house for intel on the shadow client]]|Exit=|Exit 1=Locate the exit}} |
||
| − | ''Reynard's cell has already carried out a number of attacks on members of the global elite whom we assume were Providence operatives. She and her new partner, a former CICADA mercenary by the name of [[HITMAN™ 2 Side Characters#Orson_Mills|Orson Mills]], are laying low in a remote beach house in Hawke's Bay, New Zealand - no doubt planning the militia's next attack.'' |
||
| + | ==Description == |
||
| − | ''Reynard is undoubtedly high on the client's target list, but for now it is information that we seek. So, infiltrate the house and get us a lead on the shadow client."''}} |
||
| + | Following the events of ''[[HITMAN (2016)|HITMAN™]]'', [[Diana Burnwood]] has convinced the [[ICA]] to accept a contract from [[Providence]] to track down and eliminate the [[Shadow Client]] and his militia, who have been systematically eliminating Providence members around the world. In return, Diana hopes to receive information about [[Agent 47]]'s unknown past. |
||
| − | ---- |
||
| + | Their first mission is to investigate and eliminate [[Alma Reynard]], a skilled spy working for the militia. 47 must infiltrate her hideout on the shore of [[Hawke's Bay]] in [[New Zealand]] to uncover information on the militia's next move, then eliminate Reynard and make his escape. Preferably, without raising suspicion. |
||
| − | == Mission Stories== |
||
| − | There are no mission stories in this mission. |
||
| − | == |
+ | ==Mission Stories == |
| + | ''There are no Mission Stories available for this mission.'' |
||
| − | #Murder Victims{{Spoiler|A deceased couple was discovered in the garage, and the cause of death seemed to be execution. The bodies are unidentified, but the male resembles Godfrey Numan; a member of the Olympic committee. Since New Zealand has recently made a bid to host the Olympics, it is not unlikely that Numan and his wife were planning to meet with the Prime Minister, who happens to host a garden party this very evening. If so, we may be looking at a case of identity theft. Alma Reynard is an infiltration specialist and like 47, she is known to use disguises. }} |
||
| − | #Chloroform Canister{{Spoiler|Reynard's cell has obtained a large canister of chloroform, a powerful sedative. It seems likely that they are in New Zealand to perpetrate a kidnapping.}} |
||
| − | #Militia Operations Reports{{Spoiler|Operations reports on every major militia strike going back to the [[Thomas Cross]]' kidnapping. [[Berlin]]. [[Shanghai]]. The murder of shipping mogul [[Rex Larsson]] in Montreal just a few days ago. Looks like Raynard had a hand in all of them.}} |
||
| − | #File on Dynasty Global{{Spoiler|A file on Rupert Pierce, founder of Dynasty Global; the world's largest internet retailer. If Pierce is a Providence operative, he undoubtedly ranks high on the militia's hit list. Pierce is based in [[London]], so he cannot be Reynard's immediate target. However, his VP Lance Donovan is from nearby Wellington and his brother is the New Zealand Prime Minister. }} |
||
| − | #Whiteboard{{Spoiler|Reynard's cell has been studying the sewer mas of an affluent residential area in Wellington. They appear to be planning a domestic kidnapping using two teams. One to infiltrate and disable security, and another to extract the mark and vanish through the sewers. The target's name is Donovan.}} |
||
| − | #Password Dongle{{Spoiler|A password dongle allowing access to the upstairs computer.}} |
||
| − | == |
+ | ==Intelligence== |
| + | *Chloroform Canister |
||
| − | {| class="article-table" |
||
| + | {{Spoiler|Reynard's cell has obtained a large canister of chloroform, a powerful sedative. It seems likely that they are in New Zealand to perpetrate a kidnapping.}} |
||
| − | |+'''Type Key: A=Assassination; D=Discovery; F=Feats; T=Targets; TC=The Classics; S=Shinobi; TN=Thriller Night;''' |
||
| + | *File on Dynasty Global |
||
| + | {{Spoiler|A file on Rupert Pierce, founder of Dynasty Global; the world's largest internet retailer. If Pierce is a Providence operative, he undoubtedly ranks high on the militia's hit list. Pierce is based in [[London]], so he cannot be Reynard's immediate target. However, his VP Lance Donovan is from nearby [[Wellington]] and his brother is the New Zealand Prime Minister.}} |
||
| + | *House Keys |
||
| + | {{Spoiler|Keys to the house.}} |
||
| + | * Militia Operations Reports |
||
| + | {{Spoiler|Operations reports on every major militia strike going back to the [[Thomas Cross]]' kidnapping. [[Berlin]]. [[Shanghai]]. The murder of shipping mogul [[Rex Larsson]] in Montreal just a few days ago. Looks like Raynard had a hand in all of them.}} |
||
| + | *Murder Victims |
||
| + | {{Spoiler|A deceased couple was discovered in the garage, and the cause of death seemed to be execution. The bodies are unidentified, but the male resembles Godfrey Numan; a member of the Olympic committee. Since New Zealand has recently made a bid to host the Olympics, it is not unlikely that Numan and his wife were planning to meet with the Prime Minister, who happens to host a garden party this very evening. If so, we may be looking at a case of identity theft. Alma Reynard is an infiltration specialist and like 47, she is known to use disguises.}} |
||
| + | *Password Dongle |
||
| + | {{Spoiler|A password dongle allowing access to the upstairs computer.}} |
||
| + | *Pool Entrance Key |
||
| + | {{Spoiler|A key that opens the door to the pool.}} |
||
| + | *Whiteboard |
||
| + | {{Spoiler|Reynard's cell has been studying the sewer mas of an affluent residential area in Wellington. They appear to be planning a domestic kidnapping using two teams. One to infiltrate and disable security, and another to extract the mark and vanish through the sewers. The target's name is Donovan.}} |
||
| + | ==Challenges== |
||
| + | There are 33 challenges in total: 19 "Assassination", 5 "Discovery", 3 "Feats", 1 "Targets" & 5 "The Classics", worth 63000XP.<div align="center">'''Type Key: A=Assassination; D=Discovery; F=Feats; T=Targets; TC=The Classics; S=Shinobi; TN=Thriller Night'''</div> |
||
| + | {| class="mw-collapsible mw-collapsed article-table" |
||
| + | ! style="text-align:center;" | '''Name''' |
||
| + | ! style="text-align:center;" |'''Type''' |
||
| + | ! style="text-align:center;" |'''Description''' |
||
| + | ! style="text-align:center;" |'''Rewards''' |
||
|- |
|- |
||
| + | ! style="text-align:center;" |'''[[Like Fish In A Barrel|Like Fish in a Barrel]]'''[[File:Like Fish in a Barrel New.png|center|thumb]] |
||
| − | !Name |
||
| + | | style="text-align:center;" |'''A'''[[File:Icon-Assassination.png|center|thumb]] |
||
| − | !Type |
||
| + | | style="text-align:center;" |Assassinate Alma Reynard from the roof, while she is in the panic room. |
||
| − | !Description |
||
| + | ! style="text-align:center;" |'''+4000XP''' |
||
| − | !Rewards |
||
|- |
|- |
||
| + | ! style="text-align:center;" |'''[[Smells like Nail Polish]]'''[[File:Smells Like Nail Polish.png|center|thumb]] |
||
| − | ! Sleep Tight |
||
| + | | style="text-align:center;" | '''A'''[[File:Icon-Assassination.png|center|thumb]] |
||
| − | | '''A''' |
||
| − | | |
+ | | style="text-align:center;" |Assassinate Alma Reynard by poisoning the ventilation system. |
| + | ! style="text-align:center;" |'''+1000XP''' |
||
| − | ! Mission Mastery +1000 |
||
|- |
|- |
||
| + | ! style="text-align:center;" | '''[[A Clean Kill]]'''[[File:A Clean Kill.png|center|thumb]] |
||
| − | ! Sugar, Honey, Honey |
||
| + | | style="text-align:center;" |'''A'''[[File:Icon-Assassination.png|center|thumb]] |
||
| − | | '''A''' |
||
| − | | Assassinate Alma Reynard |
+ | | style="text-align:center;" |Assassinate Alma Reynard while Orson Mills is in the shower. |
| + | ! style="text-align:center;" | '''+2000XP''' |
||
| − | ! Mission Mastery +2000 |
||
|- |
|- |
||
| + | ! style="text-align:center;" |'''[[Sugar, Honey, Honey]]'''[[File:Sugar, Honey, Honey.png|center|thumb]] |
||
| − | ! Smells Like Nail Polish |
||
| + | | style="text-align:center;" |'''A'''[[File:Icon-Assassination.png|center|thumb]] |
||
| − | | '''A''' |
||
| − | | Assassinate Alma Reynard by poisoning |
+ | | style="text-align:center;" |Assassinate Alma Reynard by poisoning her tea. |
| + | ! style="text-align:center;" |'''+2000XP''' |
||
| − | ! Mission Mastery +1000 |
||
|- |
|- |
||
| + | ! style="text-align:center;" | '''[[Sleep Tight]]'''[[File:Sleep Tight.png|center|thumb]] |
||
| − | ! A Clean Kill |
||
| + | | style="text-align:center;" |'''A'''[[File:Icon-Assassination.png|center|thumb]] |
||
| − | | '''A''' |
||
| − | | |
+ | | style="text-align:center;" | Smother Alma Reynard with a pillow while she's sleeping. |
| + | ! style="text-align:center;" |'''+1000XP''' |
||
| − | ! Mission Mastery +2000 |
||
|- |
|- |
||
| + | ! style="text-align:center;" |'''[[Deadly Ninja]]'''*[[File:Deadly Ninja Tile.png|center|thumb]] |
||
| − | ! Like Fish In A Barrel |
||
| + | | style="text-align:center;" |'''A'''[[File:Icon-Assassination.png|center|thumb]] |
||
| − | | '''A''' |
||
| + | | style="text-align:center;" |Eliminate 10 people using only katanas and shurikens. |
||
| − | | Assassinate Alma Reynard from the roof, while she is in the panic room. |
||
| + | ! style="text-align:center;" |'''+1000XP''' |
||
| − | ! Mission Mastery +4000 |
||
|- |
|- |
||
| + | ! style="text-align:center;" |'''[[Versatile Assassin]]'''[[File:Versatile H3.png|center|thumb]] |
||
| − | ! Under The Mat |
||
| + | | style="text-align:center;" |'''A'''[[File:Icon-Assassination.png|center|thumb]] |
||
| − | | '''D''' |
||
| + | |Complete all the Versatile challenges in Hawke's Bay:*Piano Man |
||
| − | | Find the hidden house key. |
||
| + | *Someone Could Hurt Themselves |
||
| − | ! Mission Mastery +1000 |
||
| + | *Hold My Hair |
||
| + | *Straight Shot |
||
| + | *Tasteless, Traceless |
||
| + | ! style="text-align:center;" |'''+4000XP''' |
||
|- |
|- |
||
| + | ! style="text-align:center;" |'''[[Straight Shot]]'''[[File:Headshot H3.png|center|thumb]] |
||
| − | ! Don't Tread On Me! |
||
| + | | style="text-align:center;" | '''A'''[[File:Icon-Assassination.png|center|thumb]] |
||
| − | | '''D''' |
||
| + | | style="text-align:center;" |Assassinate a target with a headshot in Hawke's Bay. |
||
| − | | Find the squeaky toy. |
||
| + | ! style="text-align:center;" |'''+1000XP''' |
||
| − | ! Mission Mastery +1000 |
||
|- |
|- |
||
| + | ! style="text-align:center;" |'''[[Deadly Shadow]]'''*[[File:Deadly Shadow Tile.png|center|thumb]] |
||
| − | ! Wood You Believe It? |
||
| + | | style="text-align:center;" |'''A'''[[File:Icon-Assassination.png|center|thumb]] |
||
| − | | '''D''' |
||
| + | | |
||
| − | | Find the driftwood weapon. |
||
| + | *Eliminate a target with a katana while wearing your suit. |
||
| − | ! Mission Mastery +2000 |
||
| + | *No bodies found. |
||
| + | ! style="text-align:center;" |'''+2000XP''' |
||
|- |
|- |
||
| + | ! style="text-align:center;" |'''[[Contained Explosion]]'''*[[File:Contained Explosion Tile.png|center|thumb]] |
||
| − | ! Discover Hawke's Bay |
||
| + | | style="text-align:center;" |'''A'''[[File:Icon-Assassination.png|center|thumb]] |
||
| − | | '''D''' |
||
| + | | |
||
| − | | Reveal all undiscovered areas in Hawke's Bay. |
||
| + | *Eliminate a target with an explosion. |
||
| − | ! Mission Mastery +1000 |
||
| + | *Don't kill or pacify anyone else in the explosion. |
||
| + | ! style="text-align:center;" |'''+2000XP''' |
||
|- |
|- |
||
| + | ! style="text-align:center;" | '''[[Hold My Hair]]'''[[File:Drown H3.png|center|thumb]] |
||
| − | ! Orson Bathes |
||
| + | | style="text-align:center;" | '''A'''[[File:Icon-Assassination.png|center|thumb]] |
||
| − | | '''F''' |
||
| − | | Assassinate |
+ | | style="text-align:center;" |Assassinate a target by drowning them in Hawke's Bay. |
| + | ! style="text-align:center;" |'''+1000XP''' |
||
| − | ! Mission Mastery +1000 |
||
|- |
|- |
||
| + | ! style="text-align:center;" |'''[[Hitman With A Shotgun|Hitman with a Shotgun]]'''†[[File:Hitman With A Shotgun.png|center|thumb]] |
||
| − | ! Death Of A Statesman |
||
| + | | style="text-align:center;" |'''A'''[[File:Icon-Assassination.png|center|thumb]] |
||
| − | | '''F''' |
||
| + | | |
||
| − | | Spike Orson's whiskey with a lethal dose of poison. |
||
| + | *Eliminate 5 guards with a shotgun without getting spotted. |
||
| − | ! Mission Mastery +1000 |
||
| + | *Getting spotted resets the counter. |
||
| + | ! style="text-align:center;" |'''+2000XP''' |
||
|- |
|- |
||
| + | ! style="text-align:center;" |'''[[Someone Could Hurt Themselves]]'''[[File:Accident H3.png|center|thumb]] |
||
| − | ! Mr. Sandman |
||
| + | | style="text-align:center;" |'''A'''[[File:Icon-Assassination.png|center|thumb]] |
||
| − | | '''F''' |
||
| + | | style="text-align:center;" |Assassinate a target in an accident in Hawke's Bay. |
||
| − | | Assassinate Alma by shooting her through the skylight above her bed while she's sleeping. |
||
| + | ! style="text-align:center;" |'''+1000XP''' |
||
| − | ! Mission Mastery +1000 |
||
|- |
|- |
||
| + | ! style="text-align:center;" |'''[[Waterbender]]'''*[[File:Waterbender Tile.png|center|thumb]] |
||
| − | ! Tasteless, Traceless |
||
| + | | style="text-align:center;" |'''A'''[[File:Icon-Assassination.png|center|thumb]] |
||
| − | | '''F''' |
||
| + | | style="text-align:center;" |Pacify someone with the aquarium. |
||
| − | | Assassinate a target with lethal poison. |
||
| + | ! style="text-align:center;" |'''+1000XP''' |
||
| − | ! Mission Mastery +1000 |
||
|- |
|- |
||
| + | ! style="text-align:center;" |'''[[Piano Man]]'''[[File:Piano Man H3.png|center|thumb]] |
||
| − | ! Someone Could Hurt Themselves |
||
| + | | style="text-align:center;" |'''A'''[[File:Icon-Assassination.png|center|thumb]] |
||
| − | | '''F''' |
||
| − | | Assassinate a target in |
+ | | style="text-align:center;" |Assassinate a target with the fiber wire in Hawke's Bay. |
| + | ! style="text-align:center;" |'''+1000XP''' |
||
| − | ! Mission Mastery +1000 |
||
|- |
|- |
||
| + | ! style="text-align:center;" |'''[[Vertigo]]'''†[[File:VertigoChallenge.png|center|thumb]] |
||
| − | ! Straight Shot |
||
| + | | style="text-align:center;" |'''A'''[[File:Icon-Assassination.png|center|thumb]] |
||
| − | | '''F''' |
||
| + | | style="text-align:center;" |Eliminate a target by pushing or dumping them from high above. |
||
| − | | Assassinate a target with a headshot. |
||
| + | ! style="text-align:center;" |'''+1000XP''' |
||
| − | ! Mission Mastery +1000 |
||
|- |
|- |
||
| + | ! style="text-align:center;" |'''[[No Running on the Tiles!]]'''[[File:No Running on the Tiles!.png|center|thumb]] |
||
| − | ! No Running On The Tiles! |
||
| + | | style="text-align:center;" |'''A'''[[File:Icon-Assassination.png|center|thumb]] |
||
| − | | '''F''' |
||
| − | | Push someone into the pool. |
+ | | style="text-align:center;" |Push someone into the pool. |
| + | ! style="text-align:center;" |'''+1000XP''' |
||
| − | ! Mission Mastery +1000 |
||
|- |
|- |
||
| + | ! style="text-align:center;" |'''[[The Scissor Man]]'''†[[File:The Scissor Man.png|center|thumb]] |
||
| − | ! Chameleon |
||
| + | | style="text-align:center;" |'''A'''[[File:Icon-Assassination.png|center|thumb]] |
||
| − | | '''F''' |
||
| + | | style="text-align:center;" |Eliminate a target with a pair of scissors. |
||
| − | | Find and equip all disguises in Hawke's Bay. |
||
| + | ! style="text-align:center;" |'''+1000XP''' |
||
| − | ! Mission Mastery +1000 |
||
|- |
|- |
||
| + | ! style="text-align:center;" |'''[[Tasteless, Traceless]]'''[[File:Tasteless H3.png|center|thumb]] |
||
| − | ! Versatile Assassin |
||
| + | | style="text-align:center;" |'''A'''[[File:Icon-Assassination.png|center|thumb]] |
||
| − | | '''F''' |
||
| − | | |
+ | | style="text-align:center;" |Assassinate a target with lethal poison in Hawke's Bay. |
| + | ! style="text-align:center;" | '''+1000XP''' |
||
| − | |||
| − | |||
| − | *Piano Man |
||
| − | *Someone Could Hurt Themselves |
||
| − | *Hold My Hair |
||
| − | *Straight Shot |
||
| − | *Tasteless, Traceless |
||
| − | ! None |
||
|- |
|- |
||
| + | ! style="text-align:center;" |'''[[Discover Hawke's Bay]]'''[[File:Hawke's Bay.png|center|thumb]] |
||
| − | ! Piano Man |
||
| + | | style="text-align:center;" |'''D'''[[File:Icon-Discovery.png|center|thumb]] |
||
| − | | '''F''' |
||
| + | | style="text-align:center;" |Reveal all undiscovered areas in Hawke's Bay. |
||
| − | | Assassinate a target with the fiber wire. |
||
| + | ! style="text-align:center;" |'''+1000XP''' |
||
| − | ! Mission Mastery +1000 |
||
|- |
|- |
||
| + | ! style="text-align:center;" |'''[[Wood You Believe It?]]'''[[File:Wood You Believe It?.png|center|thumb]] |
||
| − | ! Hold My Hair |
||
| + | | style="text-align:center;" |'''D'''[[File:Icon-Discovery.png|center|thumb]] |
||
| − | | '''F''' |
||
| + | | style="text-align:center;" |Find the driftwood weapon. |
||
| − | | Assassinate a target by drowning them. |
||
| + | ! style="text-align:center;" |'''+2000XP''' |
||
| − | ! Mission Mastery +1000 |
||
|- |
|- |
||
| + | ! style="text-align:center;" |'''[[Don't Tread on Me!]]'''[[File:Don't Tread on Me!.png|center|thumb]] |
||
| − | ! The Mastermind |
||
| + | | style="text-align:center;" |'''D'''[[File:Icon-Discovery.png|center|thumb]] |
||
| − | | '''T''' |
||
| + | | style="text-align:center;" |Find the squeaky toy. |
||
| − | | Assassinate Alma Reynard. |
||
| + | ! style="text-align:center;" |'''+1000XP''' |
||
| − | ! Mission Mastery +1000 |
||
|- |
|- |
||
| + | ! style="text-align:center;" |'''[[Chameleon]]'''[[File:Chameleon H3.png|center|thumb]] |
||
| − | ! The Classics |
||
| + | | style="text-align:center;" | '''D'''[[File:Icon-Discovery.png|center|thumb]] |
||
| − | | '''TC''' |
||
| + | | style="text-align:center;" |Find and equip all disguises in Hawke's Bay. |
||
| − | | Complete all the Classic challenges on "Nightcall" on X difficulty: |
||
| + | ! style="text-align:center;" |'''+4000XP''' |
||
| − | |||
| + | |- |
||
| − | |||
| + | ! style="text-align:center;" |'''[[Under the Mat]]'''[[File:Under the Mat.png|center|thumb]] |
||
| − | *Silent Assassin |
||
| + | | style="text-align:center;" |'''D'''[[File:Icon-Discovery.png|center|thumb]] |
||
| − | *Silent Assassin, Suit Only |
||
| + | | style="text-align:center;" |Find the hidden house key. |
||
| − | *Sniper Assassin |
||
| + | ! style="text-align:center;" |'''+1000XP''' |
||
| − | *Suit Only |
||
| + | |- |
||
| − | *No Evidence |
||
| + | ! style="text-align:center;" |'''[[Mr. Sandman]]'''[[File:Mr. Sandman.png|center|thumb]] |
||
| − | ! Mission Mastery +8000 (master)<br />Mission Mastery +4000 (professional)<br />Mission Mastery +2000 (casual) |
||
| + | | style="text-align:center;" |'''F'''[[File:Icon-Disguise.png|center|thumb]] |
||
| + | | style="text-align:center;" |Assassinate Alma by shooting her through the skylight above her bed while she's sleeping. |
||
| + | ! style="text-align:center;" |'''+1000XP''' |
||
| + | |- |
||
| + | ! style="text-align:center;" | '''[[Death of a Statesman]]'''[[File:Death of a Statesman.png|center|thumb]] |
||
| + | | style="text-align:center;" |'''F'''[[File:Icon-Disguise.png|center|thumb]] |
||
| + | | style="text-align:center;" | Spike Orson's whiskey with a lethal dose of poison. |
||
| + | ! style="text-align:center;" |'''+1000XP''' |
||
| + | |- |
||
| + | ! style="text-align:center;" |'''[[Orson Bathes]]'''[[File:Orson Bathes.png|center|thumb]] |
||
| + | | style="text-align:center;" |'''F'''[[File:Icon-Disguise.png|center|thumb]] |
||
| + | | style="text-align:center;" |Assassinate Orson Mills with a kitchen knife while he's in the shower. |
||
| + | ! style="text-align:center;" |'''+1000XP''' |
||
| + | |- |
||
| + | ! style="text-align:center;" | '''[[The Mastermind (Nightcall)|The Mastermind]]'''[[File:The Mastermind 2 Still.png|center|thumb]] |
||
| + | | style="text-align:center;" |'''T'''[[File:Icon-Target.png|center|thumb]] |
||
| + | | style="text-align:center;" |Assassinate Alma Reynard. |
||
| + | ! style="text-align:center;" |'''+1000XP''' |
||
| + | |- |
||
| + | ! style="text-align:center;" |'''[[Sniper Assassin]]'''[[File:Sniper Assassin Tile H3.png|center|thumb]] |
||
| + | | style="text-align:center;" |'''TC'''[[File:Icon-Classic.png|center|thumb]] |
||
| + | | |
||
| + | *Complete "Nightcall". |
||
| + | *Assassinate your targets with a sniper rifle. |
||
| + | *Only eliminate the targets. |
||
| + | *Do not get spotted. |
||
| + | ! style="text-align:center;" |'''+4000XP''' |
||
|- |
|- |
||
| − | ! Silent Assassin, Suit Only |
+ | ! style="text-align:center;" |'''[[Silent Assassin, Suit Only]]'''[[File:SASO 2021.webp|center|thumb]] |
| + | | style="text-align:center;" |'''TC'''[[File:Icon-Classic.png|center|thumb]] |
||
| − | | '''TC''' |
||
| |
| |
||
| − | *Complete "Nightcall" |
+ | *Complete "Nightcall". |
| − | *Only eliminate the |
+ | *Only eliminate the targets. |
*No bodies found. |
*No bodies found. |
||
*Do not get spotted. |
*Do not get spotted. |
||
*If you are detected by cameras, erase or destroy the evidence. |
*If you are detected by cameras, erase or destroy the evidence. |
||
*Do it all in your suit. |
*Do it all in your suit. |
||
| + | ! style="text-align:center;" |'''+4000XP''' |
||
| − | ! Mission Mastery +4000 (any difficulty) |
||
|- |
|- |
||
| + | ! style="text-align:center;" |'''[[The Classics]]'''[[File:The Classics H3.png|center|thumb]] |
||
| − | ! Sniper Assassin |
||
| + | | style="text-align:center;" |'''TC'''[[File:Icon-Classic.png|center|thumb]] |
||
| − | | '''TC''' |
||
| + | | Complete all The Classics challenges for "Nightcall": |
||
| − | | |
||
| + | *Silent Assassin |
||
| − | *Complete "Nightcall" on X difficulty. |
||
| + | *Silent Assassin, Suit Only |
||
| − | *Assassinate your target with a sniper rifle. |
||
| + | *Sniper Assassin |
||
| − | *Only eliminate the target. |
||
| + | *Suit Only |
||
| − | *Do not get spotted. |
||
| + | ! style="text-align:center;" |'''+4000XP''' |
||
| − | *If you're detected by cameras, erase or destroy the evidence. (master/professional) |
||
| − | ! Mission Mastery +2000 (any) |
||
| − | |- |
||
| − | ! No Evidence |
||
| − | | '''TC''' |
||
| − | | |
||
| − | *Complete "Nightcall" on X difficulty with no bodies found. |
||
| − | *If you are detected by cameras, erase or destroy the evidence. (master/professional) |
||
| − | ! Mission Mastery +1000 (any) |
||
| − | |- |
||
| − | ! Suit Only |
||
| − | | '''TC''' |
||
| − | | |
||
| − | *Assassinate the target and complete the mission on X difficulty. |
||
| − | *Do it all in your suit. |
||
| − | ! Mission Mastery +1000 (any) |
||
|- |
|- |
||
| + | ! style="text-align:center;" |'''[[Silent Assassin (Challenge)|Silent Assassin]]'''[[File:SilentAssassin2021.png|center|thumb]] |
||
| − | ! Silent Assassin |
||
| + | | style="text-align:center;" |'''TC'''[[File:Icon-Classic.png|center|thumb]] |
||
| − | | '''TC''' |
||
| |
| |
||
| − | *Complete "Nightcall" |
+ | *Complete "Nightcall". |
| − | *Only |
+ | *Only eliminate the targets. |
*No bodies found. |
*No bodies found. |
||
*Do not get spotted. |
*Do not get spotted. |
||
| − | *If you are detected by cameras, erase or destroy the evidence. |
+ | *If you are detected by cameras, erase or destroy the evidence. |
| + | ! style="text-align:center;" |'''+4000XP''' |
||
| − | ! Mission Mastery +4000 (any) |
||
|- |
|- |
||
| + | ! style="text-align:center;" |'''[[Suit Only]]'''[[File:SuitOnly2021.png|center|thumb]] |
||
| − | !Shinobi |
||
| + | | style="text-align:center;" |'''TC'''[[File:Icon-Classic.png|center|thumb]] |
||
| − | |'''S''' |
||
| + | | |
||
| − | |Complete all the Shinobi challenges: |
||
| + | *Assassinate the targets and complete the mission. |
||
| + | *Do it all in your suit. |
||
| + | ! style="text-align:center;" |'''+4000XP''' |
||
| + | |} |
||
| + | <nowiki>*</nowiki>Added in {{HITMAN2018}} Patch 2.21's [[:Category:Shinobi|Shinobi]] Challenge Pack. |
||
| + | †Added in {{HITMAN2018}} Patch 2.71.0's [[:Category:Thriller Night|Thriller Night]] Challenge Pack. |
||
| + | ===Cut Challenges=== |
||
| − | * Waterbender |
||
| + | {| class="mw-collapsible mw-collapsed article-table" |
||
| + | ! style="text-align:center;" |'''Name''' |
||
| + | ! style="text-align:center;" |'''Type''' |
||
| + | ! style="text-align:center;" | '''Description''' |
||
| + | ! style="text-align:center;" |'''Rewards''' |
||
| + | |- |
||
| + | ! style="text-align:center;" |'''[[No Evidence]]'''[[File:No Evidence S2.png|center|thumb]] |
||
| + | | style="text-align:center;" |'''TC'''[[File:Icon-Classic.png|center|thumb]] |
||
| + | | |
||
| + | *Complete "Nightcall" with no bodies discovered. |
||
| + | *If you are detected by cameras, erase or destroy the evidence. |
||
| + | ! style="text-align:center;" |'''+1000XP''' |
||
| + | |- |
||
| + | ! style="text-align:center;" |'''[[Shinobi]]'''[[File:Shinobi Tile.png|center|thumb]] |
||
| + | | style="text-align:center;" |'''S'''[[File:Icon-Disguise.png|center|thumb]] |
||
| + | |Complete all the Shinobi challenges: |
||
| + | *Waterbender |
||
* Deadly Ninja |
* Deadly Ninja |
||
| − | * |
+ | *Deadly Shadow |
| − | * |
+ | *Contained Explosion |
! |
! |
||
| − | * |
+ | *'''[[Tanto]]''' |
| + | [[File:Tanto (2021).png|center|thumb]] |
||
| − | * Mission Mastery +4000 |
||
| + | *'''+4000XP''' |
||
|- |
|- |
||
| + | ! style="text-align:center;" |'''[[Thriller Night]]'''[[File:Thriller Night.png|center|thumb]] |
||
| − | !Waterbender |
||
| + | | style="text-align:center;" |'''TN'''[[File:Icon-Disguise.png|center|thumb]] |
||
| − | |'''S''' |
||
| − | |Pacify someone with the aquarium. |
||
| − | !Mission Mastery +1000 |
||
| − | |- |
||
| − | !Deadly Ninja |
||
| − | |'''S''' |
||
| − | |Eliminate 10 people using only katanas and shurikens. |
||
| − | !Mission Mastery +1000 |
||
| − | |- |
||
| − | !Deadly Shadow |
||
| − | |'''S''' |
||
| − | | |
||
| − | * Eliminate a target with a katana while wearing your suit. |
||
| − | * No bodies found. |
||
| − | !Mission Mastery +2000 |
||
| − | |- |
||
| − | !Contained Explosion |
||
| − | |'''S''' |
||
| − | | |
||
| − | * Eliminate a target with an explosion. |
||
| − | * Don't kill or pacify anyone else in the explosion. |
||
| − | !Mission Mastery +2000 |
||
| − | |- |
||
| − | !Thriller Night |
||
| − | |'''TN''' |
||
|Complete all the Thriller Night challenges: |
|Complete all the Thriller Night challenges: |
||
| + | *Vertigo |
||
| − | |||
| − | |||
| − | * Vertigo |
||
* The Scissor Man |
* The Scissor Man |
||
| − | * |
+ | *Hitman Of The Black Lagoon |
| − | * |
+ | *Hitman With A Shotgun |
! |
! |
||
| + | *[[Red-Tie Kiwi|'''Red-Tie Kiwi''']] |
||
| − | |||
| − | + | [[File:Red Tie Kiwi (2021).png|center|thumb]] |
|
| + | * '''+4000XP''' |
||
| − | * Mission Mastery +4000 |
||
|- |
|- |
||
| + | ! style="text-align:center;" |'''[[Hitman Of The Black Lagoon|Hitman of the Black Lagoon]]'''[[File:Hitman Of The Black Lagoon.png|center|thumb]] |
||
| − | !Vertigo |
||
| + | | style="text-align:center;" |'''TN'''[[File:Icon-Disguise.png|center|thumb]] |
||
| − | |'''TN''' |
||
| − | |Eliminate a target by pushing or dumping them |
+ | | style="text-align:center;" | Eliminate a target by pushing or dumping them into the pool. |
| + | ! style="text-align:center;" |'''+2000XP''' |
||
| − | !Mission Mastery +1000 |
||
| − | |- |
||
| − | !The Scissor Man |
||
| − | |'''TN''' |
||
| − | |Eliminate a target with a pair of scissors. |
||
| − | !Mission Mastery +1000 |
||
| − | |- |
||
| − | !Hitman Of The Black Lagoon |
||
| − | |'''TN''' |
||
| − | |Eliminate a target by pushing or dumping them into the pool. |
||
| − | !Mission Mastery +2000 |
||
| − | |- |
||
| − | !Hitman With A Shotgun |
||
| − | |'''TN''' |
||
| − | | |
||
| − | *Eliminate 5 guards with a shotgun without getting spotted. |
||
| − | *Getting spotted resets the counter. |
||
| − | !Mission Mastery +2000 |
||
|} |
|} |
||
| + | All of these were cut in {{HITMAN2021}}. |
||
| − | == |
+ | ==Mastery== |
| − | {| class="article-table" |
+ | {| class="mw-collapsible mw-collapsed article-table" |
| + | |- |
||
| − | ! style="text-align:center;" |Mastery Level |
||
| − | ! style="text-align:center;" | |
+ | ! style="text-align:center;" |'''Mastery Level''' |
| − | ! style="text-align:center;" | |
+ | ! style="text-align:center;" | '''Type''' |
| − | ! style="text-align:center;" | |
+ | ! style="text-align:center;" |'''Unlock''' |
| + | ! style="text-align:center;" |'''Description''' |
||
|- |
|- |
||
| − | ! style="text-align:center;" |1 |
+ | ! style="text-align:center;" |'''1''' |
| − | | style="text-align:center;" |Starting Location |
+ | | style="text-align:center;" |Starting Location[[File:Icon-Start Location.png|center|thumb]] |
| − | | style="text-align:center;" |Boat |
+ | | style="text-align:center;" |Boat[[File:Hawke's Bay Boat.png|center|thumb]] |
|47 has arrived at Hawke's Bay by boat, a good walking distance from the house. |
|47 has arrived at Hawke's Bay by boat, a good walking distance from the house. |
||
|- |
|- |
||
| − | ! style="text-align:center;" |2 |
+ | ! rowspan="2" style="text-align:center;" |'''2''' |
| − | | style="text-align:center;" | |
+ | | style="text-align:center;" |Hidden Stash[[File:Icon-Smuggled Item.png|center|thumb]] |
| + | | style="text-align:center;" |Garbage Container[[File:Hawke's Bay SI1.jpg|center|thumb]] |
||
| − | Hidden Stash |
||
| − | (Small) |
||
| − | | style="text-align:center;" |Garbage Container |
||
|The ICA can conceal a small item inside a garbage container behind the house. |
|The ICA can conceal a small item inside a garbage container behind the house. |
||
|- |
|- |
||
| − | + | | style="text-align:center;" |Explosive[[File:Icon-Explosive.png|center|thumb]] |
|
| − | | style="text-align:center;" |Explosive |
+ | | style="text-align:center;" |[[ICA Proximity Explosive Mk II]][[File:ICA Proximity Explosive Mk II HITMAN2021.jpeg|center|thumb]] |
| − | | style="text-align:center;" |[[ICA Proximity Explosive Mk II]] |
||
|A modular explosive device designed by the ICA. Detonated by proximity. Exercise caution when placing. Highly suspicious if noticed. It also has the signature Mk II look. |
|A modular explosive device designed by the ICA. Detonated by proximity. Exercise caution when placing. Highly suspicious if noticed. It also has the signature Mk II look. |
||
|- |
|- |
||
| − | ! style="text-align:center;" |3 |
+ | ! style="text-align:center;" |'''3''' |
| − | | style="text-align:center;" |Starting Location |
+ | | style="text-align:center;" |Starting Location[[File:Icon-Start Location.png|center|thumb]] |
| − | | style="text-align:center;" |Beach |
+ | | style="text-align:center;" |Beach[[File:Hawke's Bay Beach.png|center|thumb]] |
| − | |47 arrived at Hawke's Bay, on the beach near the house. |
+ | |47 arrived at Hawke's Bay, on the beach near the house. |
|- |
|- |
||
| − | ! style="text-align:center;" |4 |
+ | ! style="text-align:center;" |'''4''' |
| − | | style="text-align:center;" |Agency Pickup |
+ | | style="text-align:center;" |Agency Pickup[[File:Icon-Smuggled Item.png|center|thumb]] |
| − | | style="text-align:center;" |Beach Shack |
+ | | style="text-align:center;" |Beach Shack[[File:Hawke's Bay SI2.jpg|center|thumb]] |
|The ICA can smuggle a briefcase containing a large item inside of an old boat house on the beach. |
|The ICA can smuggle a briefcase containing a large item inside of an old boat house on the beach. |
||
|- |
|- |
||
| − | ! style="text-align:center;" |5 |
+ | ! rowspan="3" style="text-align:center;" | '''5''' |
| − | | style="text-align:center;" |Starting Location |
+ | | style="text-align:center;" |Starting Location[[File:Icon-Start Location.png|center|thumb]] |
| − | | style="text-align:center;" |Office |
+ | | style="text-align:center;" |Office[[File:Hawke's Bay Office.png|center|thumb]] |
|47 has infiltrated the house in Hawke's Bay and starts inside the office. |
|47 has infiltrated the house in Hawke's Bay and starts inside the office. |
||
|- |
|- |
||
| − | + | | style="text-align:center;" |Explosive[[File:Icon-Explosive.png|center|thumb]] |
|
| − | | style="text-align:center;" | |
+ | | style="text-align:center;" |[[Flash Grenade]][[File:Flash Grenade HITMAN2021.jpeg|center|thumb]] |
| + | |A flash grenade. Can be thrown and detonate in a bright flash after a small delay. Will blind anyone nearby. |
||
| − | | style="text-align:center;" |[[Flash Grenade]] |
||
| + | |- |
||
| − | |A flash grenade. Can be thrown and detonate in a bright flash after a small delay. Will blind anyone nearby. |
||
| + | | style="text-align:center;" |Melee[[File:Icon-Melee.png|center|thumb]] |
||
| + | | style="text-align:center;" |[[Tanto]][[File:Tanto (2021).png|center|thumb]] |
||
| + | |A very sharp short blade. Used by samurais to perform seppuku [{{HITMAN2021}} only]. |
||
|} |
|} |
||
| − | == |
+ | ==Disguises== |
| + | <gallery> |
||
| − | *[[Bodyguard (outfit)|Bodyguard]] |
||
| + | File:Tactical Wetsuit Outfit - Mendoza.JPG|[[Tactical Wetsuit]] (Starting suit) |
||
| + | File:Bodyguard Outfit - Hawke's Bay.JPG|[[Bodyguard (outfit)|Bodyguard]] |
||
| + | </gallery> |
||
| − | == |
+ | ==Items== |
{| class="article-table" |
{| class="article-table" |
||
| − | ! colspan=" |
+ | ! colspan="5" style="text-align:center;" |'''Firearms''' |
|- |
|- |
||
| − | | style="text-align:center;" |[[Bartoli 75R]] |
+ | | style="text-align:center;" |[[Bartoli 75R]][[File:Bartoli 75R HITMAN2021.jpeg|center|thumb]] |
| − | | style="text-align:center;" |[[Bartoli 75S]] |
+ | | style="text-align:center;" |[[Bartoli 75S]][[File:Bartoli 75S HITMAN2021.jpeg|center|thumb]] |
| − | | style="text-align:center;" |[[Hackl 9S Covert]] |
+ | | style="text-align:center;" |[[Hackl 9S Covert]][[File:Hackl 9S Covert HITMAN2021.jpeg|center|thumb]] |
| − | | style="text-align:center;" |[[Kalmer 1 - Tranquilizer]] |
+ | | style="text-align:center;" |[[Kalmer 1 - Tranquilizer]][[File:Kalmer 1 - Tranquilizer HITMAN3.jpeg|center|thumb]] |
| + | | style="text-align:center;" |[[HX-7]][[File:HX-7 HITMAN2021.jpeg|center|thumb]] |
||
|- |
|- |
||
| − | | style="text-align:center;" |[[ |
+ | | colspan="2" style="text-align:center;" |[[Fusil G1-4/C|Fusil G1-4C]][[File:Fusil G1-4 C HITMAN2021.jpeg|center|thumb]] |
| − | | colspan=" |
+ | | colspan="3" style="text-align:center;" |[[Tactical Bartoli 12G]][[File:Tactical Bartoli 12G HITMAN2021.jpeg|center|thumb]] |
| − | | style="text-align:center;" |[[Fusil G1-4/C|Fusil G1-4C]] |
||
|- |
|- |
||
| − | ! colspan=" |
+ | ! colspan="5" style="text-align:center;" |'''Melee''' |
| − | <p style="text-align:center;">Melee Weapons</p> |
||
|- |
|- |
||
| − | | style="text-align:center;" |[[Bust]] |
+ | | style="text-align:center;" |[[Bust]][[File:Statue Bust A HITMAN2021.jpeg|center|thumb]] |
| − | | style="text-align:center;" |[[Car Battery]] |
+ | | style="text-align:center;" |[[Car Battery]][[File:Car Battery HITMAN2021.jpeg|center|thumb]] |
| − | | style="text-align:center;" |[[Cleaver]] |
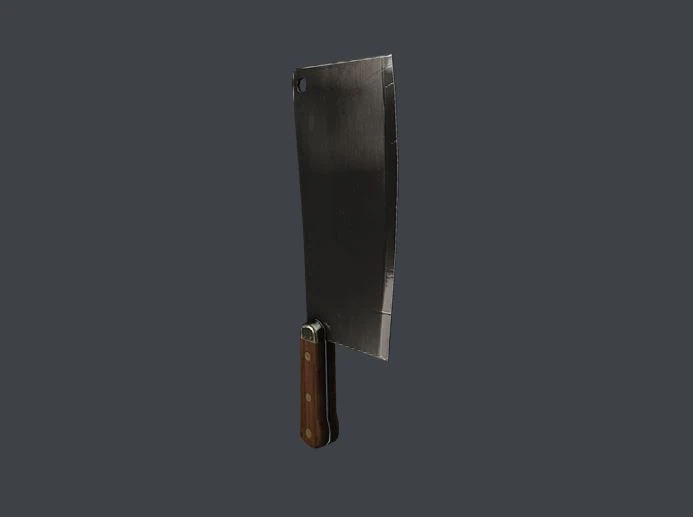
+ | | style="text-align:center;" |[[Cleaver]][[File:Cleaver HITMAN2021.jpeg|center|thumb]] |
| − | | style="text-align:center;" |[[Driftwood Log]] |
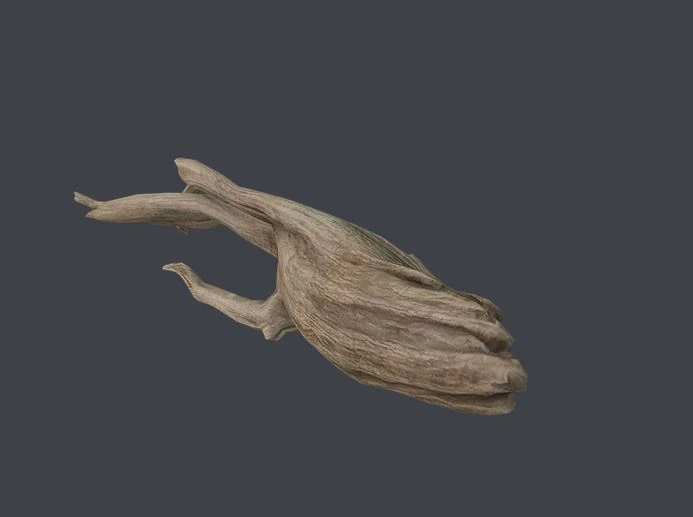
+ | | style="text-align:center;" |[[Driftwood Log]][[File:Driftwood Log HITMAN2021.jpeg|center|thumb]] |
| + | | style="text-align:center;" |[[Fire Poker]][[File:Fire Poker HITMAN2021.jpeg|center|thumb]] |
||
|- |
|- |
||
| − | | style="text-align:center;" |[[ |
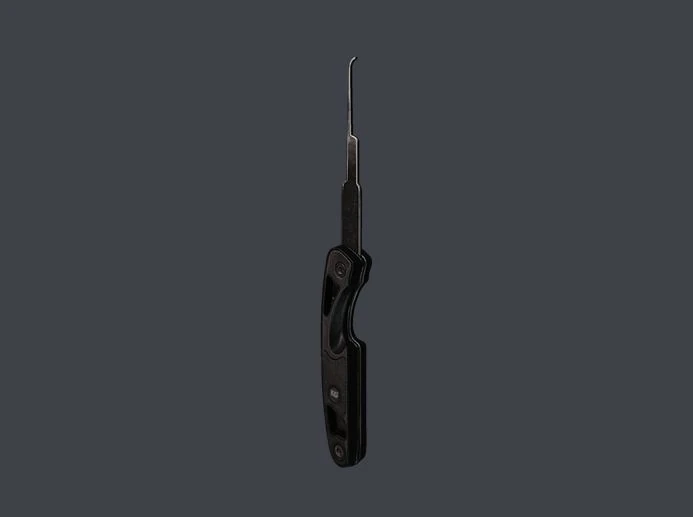
+ | | style="text-align:center;" |[[Folding Knife]][[File:Folding Knife HITMAN2021.jpeg|center|thumb]] |
| − | | style="text-align:center;" |[[ |
+ | | style="text-align:center;" |[[Katana]][[File:Katana HITMAN2021.jpeg|center|thumb]] |
| − | | style="text-align:center;" |[[ |
+ | | style="text-align:center;" |[[Kitchen Knife]][[File:Kitchen Knife HITMAN2021.jpeg|center|thumb]] |
| − | | style="text-align:center;" |[[ |
+ | | style="text-align:center;" |[[Lead Pipe]][[File:Lead Pipe HITMAN2021.jpeg|center|thumb]] |
| + | | style="text-align:center;" |[[Maori Paddle]][[File:Maori Paddle A HITMAN2021.jpeg|center|thumb]] |
||
|- |
|- |
||
| − | | style="text-align:center;" |[[ |
+ | | style="text-align:center;" |[[Scissors]][[File:Scissors HITMAN2021.jpeg|center|thumb]] |
| − | | style="text-align:center;" |[[ |
+ | | style="text-align:center;" |[[Screwdriver]][[File:Screwdriver HITMAN2021.jpeg|center|thumb]] |
| − | | style="text-align:center;" |[[ |
+ | | style="text-align:center;" |[[Shovel]][[File:Shovel HITMAN2021.jpeg|center|thumb]] |
| − | | style="text-align:center;" |[[ |
+ | | style="text-align:center;" |[[Shuriken]][[File:Shuriken HITMAN2021.jpeg|center|thumb]] |
| + | | style="text-align:center;" |[[Soda Can]][[File:DrPopp Soda.png|center|thumb]] |
||
|- |
|- |
||
| − | | style="text-align:center;" |[[ |
+ | | colspan="2" rowspan="2" style="text-align:center;" |[[Wrench]][[File:Wrench HITMAN2021.jpeg|center|thumb]] |
| − | | style="text-align:center;" | |
+ | | colspan="3" style="text-align:center;" |'''Explosives''' |
| − | | style="text-align:center;" |[[Soda Can]] |
||
| − | | style="text-align:center;" |[[Wrench]] |
||
|- |
|- |
||
| + | | style="text-align:center;" |[[Fragmentation Grenade]][[File:Fragmentation Grenade HITMAN2021.jpeg|center|thumb]] |
||
| − | ! colspan="4" | |
||
| − | + | | colspan="2" style="text-align:center;" |[[Propane Tank|Propane Flask]][[File:Propane Flask HITMAN2021.jpeg|center|thumb]] |
|
|- |
|- |
||
| − | + | ! colspan="5" style="text-align:center;" |'''Distractions''' |
|
| − | | colspan="2" style="text-align:center;" |[[Explosive Propane Flask]] |
||
|- |
|- |
||
| − | + | | style="text-align:center;" |[[Apple]][[File:Apple Red HITMAN2021.jpeg|center|thumb]] |
|
| + | | style="text-align:center;" |[[Coin]][[File:Coin-HITMAN2021.jpg|center|thumb]] |
||
| + | | colspan="2" style="text-align:center;" |[[Squeaky Toy]][[File:Squeaky Toy HITMAN2021.jpeg|center|thumb]] |
||
| + | | style="text-align:center;" |[[Wristwatch Alarm]][[File:Wristwatch Alarm HITMAN2021.jpeg|center|thumb]] |
||
|- |
|- |
||
| − | + | ! colspan="5" style="text-align:center;" |'''Poisons''' |
|
| − | | style="text-align:center;" |[[Coin]] |
||
| − | | style="text-align:center;" |[[Squeaky Toy]] |
||
| − | | style="text-align:center;" |[[Wristwatch Alarm]] |
||
|- |
|- |
||
| − | + | | style="text-align:center;" |[[Cannabis Joint]][[File:Cannabis Joint HITMAN2021.jpeg|center|thumb]] |
|
| + | | style="text-align:center;" |[[Chloroform Flask]][[File:Chloroform Flask HITMAN2021.jpeg|center|thumb]] |
||
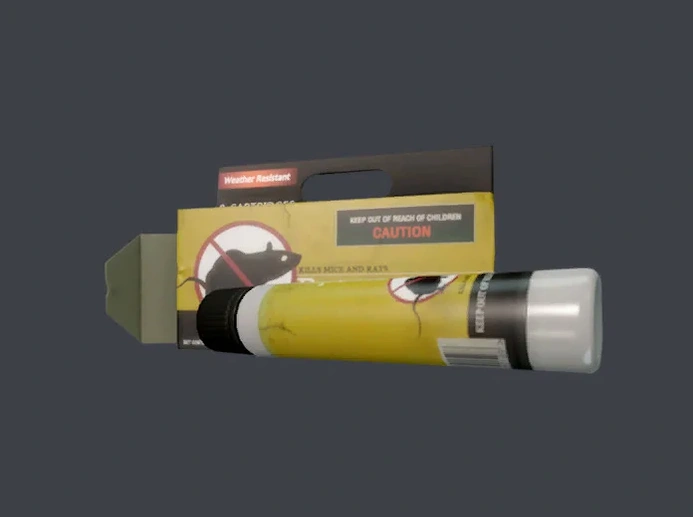
| + | | style="text-align:center;" |[[Emetic Rat Poison]][[File:Emetic Rat Poison.png|center|thumb]] |
||
| + | | style="text-align:center;" |[[Expired Can of Spaghetti Sauce]][[File:Expired Can HITMAN2021.jpeg|center|thumb]] |
||
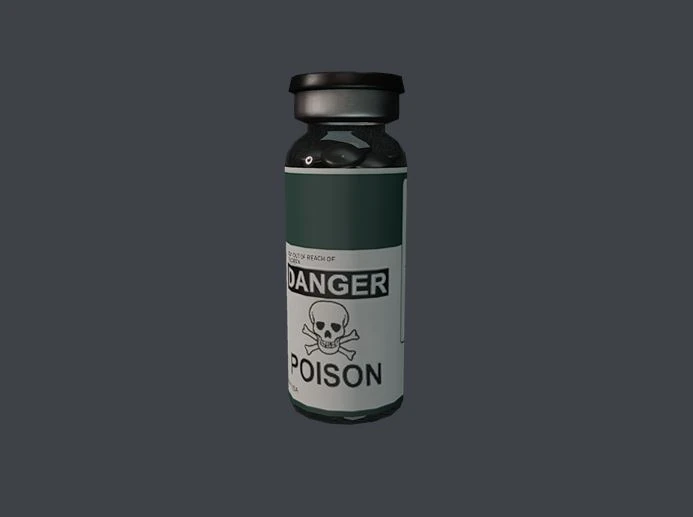
| + | | style="text-align:center;" |[[Lethal Poison Pill Jar]][[File:Lethal Poison Pill Jar HITMAN2021.jpeg|center|thumb]] |
||
|- |
|- |
||
| − | | style="text-align:center;" | |
+ | | colspan="5" style="text-align:center;" |'''Tools''' |
| + | |- |
||
| − | | style="text-align:center;" |[[Chloroform Flask]] |
||
| − | | style="text-align:center;" |[[ |
+ | | colspan="5" style="text-align:center;" |[[Lockpick (Tool)|Lockpick]][[File:Lockpick HITMAN2021.jpeg|center|thumb]] |
| − | | style="text-align:center;" |[[Expired Can of Spaghetti Sauce]] |
||
|} |
|} |
||
| − | == |
+ | ==Other NPCs== |
| − | * |
+ | *[[Orson Mills]] - [[CICADA]] Mercenary and [[Alma Reynard]]s lover |
| + | *[[Gerard Mann]] - Head of Security and Personal Bodyguard of Reynard and Mills. |
||
| − | == |
+ | ==Gallery== |
<gallery widths="200px"> |
<gallery widths="200px"> |
||
Hawke's Bay map - Level 0 - HITMAN 2018.jpg|Map of Hawke's Bay |
Hawke's Bay map - Level 0 - HITMAN 2018.jpg|Map of Hawke's Bay |
||
Hawke's Bay map - Level 1 - HITMAN 2018.jpg|First floor of the building |
Hawke's Bay map - Level 1 - HITMAN 2018.jpg|First floor of the building |
||
Hawke's Bay map - Level 2 - HITMAN 2018.jpg|Roof of the building |
Hawke's Bay map - Level 2 - HITMAN 2018.jpg|Roof of the building |
||
| + | File:ATW 7 - Nightcall.png|A summary of the mission from IOI’s official [[World of Assassination]] guidebook |
||
</gallery> |
</gallery> |
||
| + | ==Mission Map == |
||
| − | == Escalation Contracts == |
||
| + | [[File:HITMAPS Wordmark.png|thumb|center|250px|link=https://www.hitmaps.com/games/hitman2/hawkes-bay/nightcall|The full interactive map for this mission can be viewed via HITMAPS by clicking the image or [https://www.hitmaps.com/games/hitman2/hawkes-bay/nightcall clicking here.] ]] |
||
| − | There is currently one [[Escalation Contracts|escalation contract]] available in Hawke's Bay: |
||
| + | |||
| − | * [[The Mills Reverie]] |
||
| + | ==Escalation Contracts== |
||
| + | There is currently one [[Escalation Contracts|Escalation Contract]] available in Hawke's Bay:<gallery> |
||
| + | File:The Mills Reverie complete.png|[[The Mills Reverie]] |
||
| + | </gallery> |
||
| + | |||
| + | ==Elusive Targets== |
||
| + | This is the list of the [[Elusive Targets]] that appeared in Hawke's Bay, with reactivations occuring during {{HITMAN2018}} & {{HITMAN2021}}.<gallery> |
||
| + | File:The Politician Official.png|#30: [[The Politician (Nightcall)|The Politician]] |
||
| + | </gallery> |
||
| − | == |
+ | ==Target Lockdown== |
| − | Alma Reynard has a safe room on the second floor, hidden behind the wall in her office. She will run there during an emergency with Orson. When this happens, the safe room is locked and cannot be accessed from either |
+ | Alma Reynard has a safe room on the second floor, hidden behind the wall in her office. She will run there during an emergency with Orson. When this happens, the safe room is locked and cannot be accessed from either the office with the computer (whose painting opens the secret door) or the garage where the safe room's second door opens. Players can circumvent this at any time by destroying the safe room's hatch on the roof. If the safe room is breached or discovered by the player, she will run into the sea and commit suicide. In some cases, Alma Reynard will run to the truck where the grave is being dug and huddle by the mercenaries there; while other times, Alma Reynard will run to the edge of the water but remain alive, perhaps due to a deviation in her functions after the safe room being discovered. The player can kill her if they manage to get close enough by hiding in vegetation and shooting her from a distance or by rushing and pacifying her. In any case, it seems that repeatedly causing disturbances is enough to eventually frighten her into drowning herself. |
| + | ==Trivia== |
||
| + | *There are a total of 34 non-target NPCs in this mission. Of these, only Orson Mills is a non-combatant civilian. |
||
| + | **This level has the least amount of non-target NPCs in the [[World of Assassination]] trilogy, as well as the least number of civilians. |
||
| + | *The challenge "Sugar, Honey, Honey" takes its name from the [https://www.youtube.com/watch?v=C7T4aQMxTTM 1969 "bubblegum pop" song] by the Archies. |
||
| + | *The developers revealed that originally Alma's appearance and attire were much sexier. Later they changed it to avoid Agent 47 looking like a sexual predator. |
||
| + | *If Alma and Orson head to sleep, Alma will eventually wake up after 15 minutes to call her sister Celia and apologise for missing her daughter Mercedes's birthday, who is currently living with Celia. |
||
| + | *One of Alma's guards was apparently at the militia compound during [[Freedom Fighters]]. He can be overheard still being unnerved by how someone could infiltrate a fortified compound and kill four highly trained operatives without raising any alarm or leaving any trace. |
||
| + | *Max, Reynard's large and dangerous dog which lives in the beach house, is repeatedly referred to in NPC dialogue, and will sometimes be blamed for unknown sounds or damage caused by the player. Despite repeated references to his vicious nature, the dog itself never appears. |
||
| + | *Although conversations regularly may seem friendly, Alma and Orson often scold [[HITMAN™ 2 Side Characters#Gerard Mann|Gerard]] to tears when mistakes such as naked disarmed guards or randomly placed weapons occur. He will also be scolded if he is caught vomiting in the top floor bathroom via rat poison in the ventilation. |
||
| + | *Nightcall is the first mission in the ''Hitman'' franchise to take place in the continent of Oceania. It is also one of three missions in the ''Hitman'' franchise known to take place in the Southern Hemisphere, along with [[The Farewell]] and [[A Vintage Year]]. |
||
| + | *Alma's bodyguards will remain on high alert if anyone in the mission is alerted. This is one of three levels where this can be happen, the other two being [[The Showstopper]] in {{HITMAN2016}} and [[End of an Era]] in {{HITMAN2021}}. |
||
| + | *In {{HITMAN2021}}''', WB GAMES PRESENTS''' and '''AN IO INTERACTIVE GAME''' are replaced with '''IO INTERACTIVE PRESENTS''', due to [[IO Interactive]] being the publisher of these games. |
||
| + | *Alma drowning herself in the ocean is likely a reference to the ending of the [https://www.imdb.com/title/tt0780504/ 2011 movie "Drive"] in which the character Nino (Ron Perlman) attempts to flee into the ocean from the protagonist (Ryan Gosling). The mission also shares its name with the [https://youtu.be/H-iPavAXQUk 2011 song "Nightcall"] by Kavinsky used in the opening of Drive. |
||
{{NavboxMissionHITMAN™2}} |
{{NavboxMissionHITMAN™2}} |
||
| + | [[fr:L'Appel de la Nuit]] |
||
[[Category:HITMAN™ 2]] |
[[Category:HITMAN™ 2]] |
||
[[Category:HITMAN™ 2 missions]] |
[[Category:HITMAN™ 2 missions]] |
||
Latest revision as of 16:34, 13 December 2023
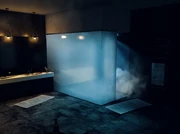
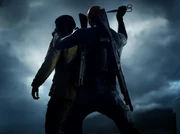
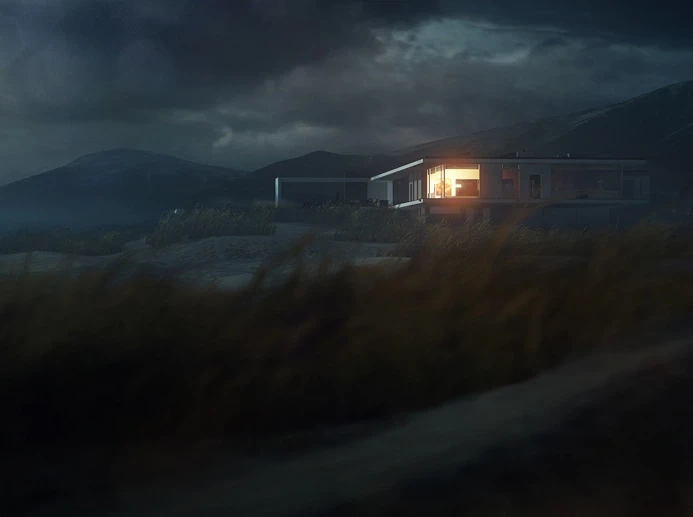
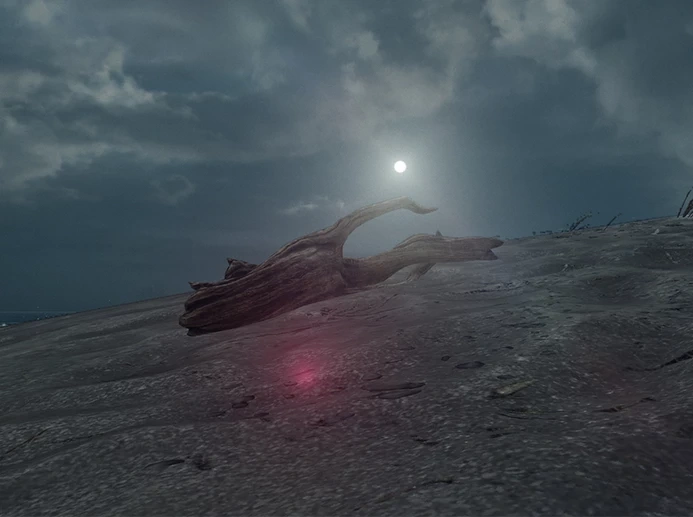
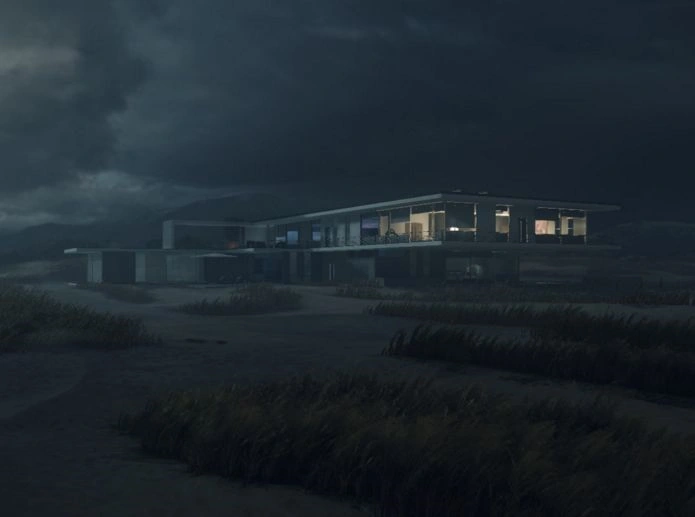
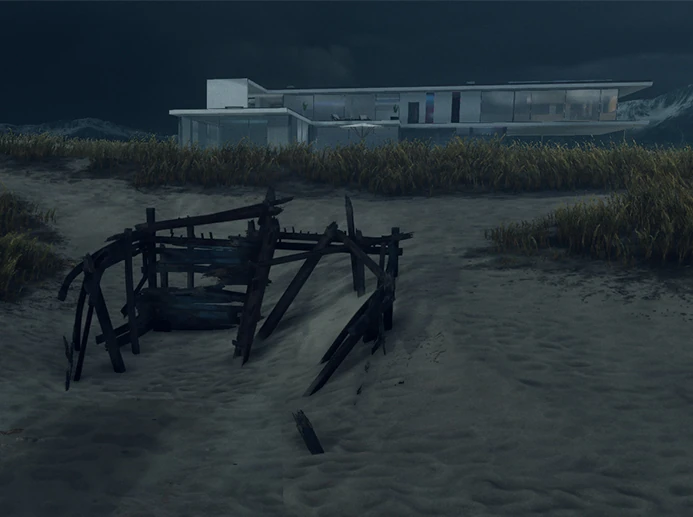
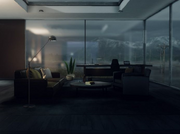
Nightcall is the prologue and first mission in HITMAN™ 2. The game begins with Agent 47 sent by boat to Hawke's Bay, New Zealand, to infiltrate the house of one of the Shadow Client's top lieutenants for intel on his identity or whereabouts. The map consists of a single lavishly appointed beach house overlooking an isolated, windswept shoreline.
As this level functions as a tutorial for new players, demonstrating the controls and mechanics of the game, it initially contains no enemies. Hostile NPC's arrive only after the player successfully accesses the office computer. While numerous, they are relatively easy to evade once outside the house, due to the low-light conditions and plentiful cover.
Targets
| Eliminate Alma Reynard |
Objectives
| Find a way into the house | |
| Search the house for intel on the shadow client |
Exfiltrate
| Locate the exit |
Nightcall
Reynard's cell has already carried out a number of attacks on members of the global elite whom we assume were Providence operatives. She and her new partner, a former CICADA mercenary by the name of Orson Mills, are laying low in a remote beach house in Hawke's Bay, New Zealand - no doubt planning the militia's next attack.
Reynard is undoubtedly high on the client's target list, but for now it is information that we seek. So, infiltrate the house and get us a lead on the shadow client.
Description
Following the events of HITMAN™, Diana Burnwood has convinced the ICA to accept a contract from Providence to track down and eliminate the Shadow Client and his militia, who have been systematically eliminating Providence members around the world. In return, Diana hopes to receive information about Agent 47's unknown past.
Their first mission is to investigate and eliminate Alma Reynard, a skilled spy working for the militia. 47 must infiltrate her hideout on the shore of Hawke's Bay in New Zealand to uncover information on the militia's next move, then eliminate Reynard and make his escape. Preferably, without raising suspicion.
Mission Stories
There are no Mission Stories available for this mission.
Intelligence
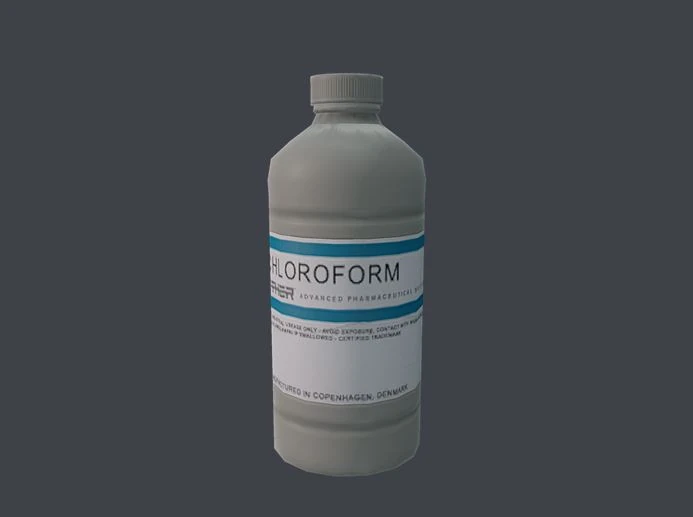
- Chloroform Canister
| The following information may contain spoilers. |
|---|
|
Reynard's cell has obtained a large canister of chloroform, a powerful sedative. It seems likely that they are in New Zealand to perpetrate a kidnapping. |
- File on Dynasty Global
| The following information may contain spoilers. |
|---|
|
A file on Rupert Pierce, founder of Dynasty Global; the world's largest internet retailer. If Pierce is a Providence operative, he undoubtedly ranks high on the militia's hit list. Pierce is based in London, so he cannot be Reynard's immediate target. However, his VP Lance Donovan is from nearby Wellington and his brother is the New Zealand Prime Minister. |
- House Keys
| The following information may contain spoilers. |
|---|
|
Keys to the house. |
- Militia Operations Reports
| The following information may contain spoilers. |
|---|
|
Operations reports on every major militia strike going back to the Thomas Cross' kidnapping. Berlin. Shanghai. The murder of shipping mogul Rex Larsson in Montreal just a few days ago. Looks like Raynard had a hand in all of them. |
- Murder Victims
| The following information may contain spoilers. |
|---|
|
A deceased couple was discovered in the garage, and the cause of death seemed to be execution. The bodies are unidentified, but the male resembles Godfrey Numan; a member of the Olympic committee. Since New Zealand has recently made a bid to host the Olympics, it is not unlikely that Numan and his wife were planning to meet with the Prime Minister, who happens to host a garden party this very evening. If so, we may be looking at a case of identity theft. Alma Reynard is an infiltration specialist and like 47, she is known to use disguises. |
- Password Dongle
| The following information may contain spoilers. |
|---|
|
A password dongle allowing access to the upstairs computer. |
- Pool Entrance Key
| The following information may contain spoilers. |
|---|
|
A key that opens the door to the pool. |
- Whiteboard
| The following information may contain spoilers. |
|---|
|
Reynard's cell has been studying the sewer mas of an affluent residential area in Wellington. They appear to be planning a domestic kidnapping using two teams. One to infiltrate and disable security, and another to extract the mark and vanish through the sewers. The target's name is Donovan. |
Challenges
There are 33 challenges in total: 19 "Assassination", 5 "Discovery", 3 "Feats", 1 "Targets" & 5 "The Classics", worth 63000XP.
| Name | Type | Description | Rewards |
|---|---|---|---|
| Like Fish in a Barrel | A |
Assassinate Alma Reynard from the roof, while she is in the panic room. | +4000XP |
| Smells like Nail Polish | A |
Assassinate Alma Reynard by poisoning the ventilation system. | +1000XP |
| A Clean Kill | A |
Assassinate Alma Reynard while Orson Mills is in the shower. | +2000XP |
| Sugar, Honey, Honey | A |
Assassinate Alma Reynard by poisoning her tea. | +2000XP |
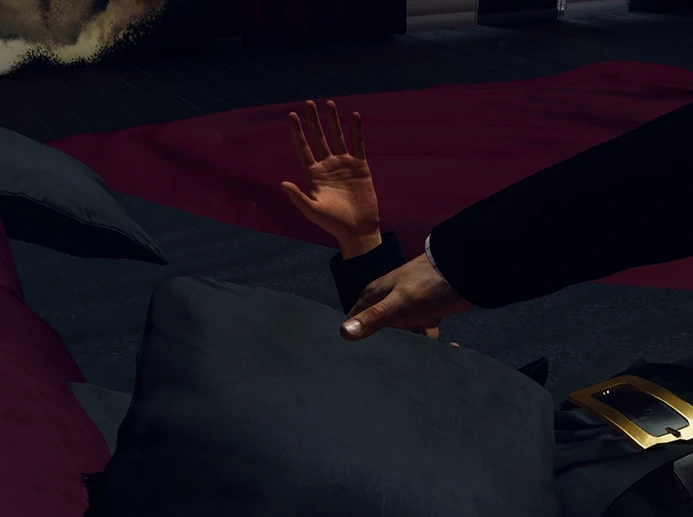
| Sleep Tight | A |
Smother Alma Reynard with a pillow while she's sleeping. | +1000XP |
| Deadly Ninja* | A |
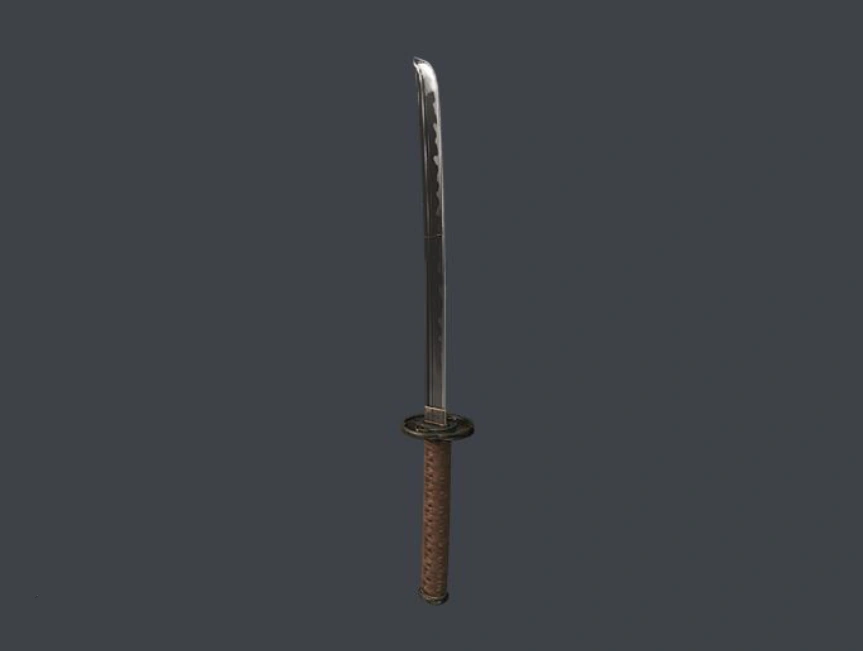
Eliminate 10 people using only katanas and shurikens. | +1000XP |
| Versatile Assassin | A |
Complete all the Versatile challenges in Hawke's Bay:*Piano Man
|
+4000XP |
| Straight Shot | A |
Assassinate a target with a headshot in Hawke's Bay. | +1000XP |
| Deadly Shadow* | A |
|
+2000XP |
| Contained Explosion* | A |
|
+2000XP |
| Hold My Hair | A |
Assassinate a target by drowning them in Hawke's Bay. | +1000XP |
| Hitman with a Shotgun† | A |
|
+2000XP |
| Someone Could Hurt Themselves | A |
Assassinate a target in an accident in Hawke's Bay. | +1000XP |
| Waterbender* | A |
Pacify someone with the aquarium. | +1000XP |
| Piano Man | A |
Assassinate a target with the fiber wire in Hawke's Bay. | +1000XP |
| Vertigo† | A |
Eliminate a target by pushing or dumping them from high above. | +1000XP |
| No Running on the Tiles! | A |
Push someone into the pool. | +1000XP |
| The Scissor Man† | A |
Eliminate a target with a pair of scissors. | +1000XP |
| Tasteless, Traceless | A |
Assassinate a target with lethal poison in Hawke's Bay. | +1000XP |
| Discover Hawke's Bay | D |
Reveal all undiscovered areas in Hawke's Bay. | +1000XP |
| Wood You Believe It? | D |
Find the driftwood weapon. | +2000XP |
| Don't Tread on Me! | D |
Find the squeaky toy. | +1000XP |
| Chameleon | D |
Find and equip all disguises in Hawke's Bay. | +4000XP |
| Under the Mat | D |
Find the hidden house key. | +1000XP |
| Mr. Sandman | F |
Assassinate Alma by shooting her through the skylight above her bed while she's sleeping. | +1000XP |
| Death of a Statesman | F |
Spike Orson's whiskey with a lethal dose of poison. | +1000XP |
| Orson Bathes | F |
Assassinate Orson Mills with a kitchen knife while he's in the shower. | +1000XP |
| The Mastermind | T |
Assassinate Alma Reynard. | +1000XP |
| Sniper Assassin | TC |
|
+4000XP |
| Silent Assassin, Suit Only | TC |
|
+4000XP |
| The Classics | TC |
Complete all The Classics challenges for "Nightcall":
|
+4000XP |
| Silent Assassin | TC |
|
+4000XP |
| Suit Only | TC |
|
+4000XP |


*Added in HITMAN™ 2 Patch 2.21's Shinobi Challenge Pack.
†Added in HITMAN™ 2 Patch 2.71.0's Thriller Night Challenge Pack.
Cut Challenges
| Name | Type | Description | Rewards |
|---|---|---|---|
| No Evidence | TC |
|
+1000XP |
| Shinobi | S |
Complete all the Shinobi challenges:
|
|
| Thriller Night | TN |
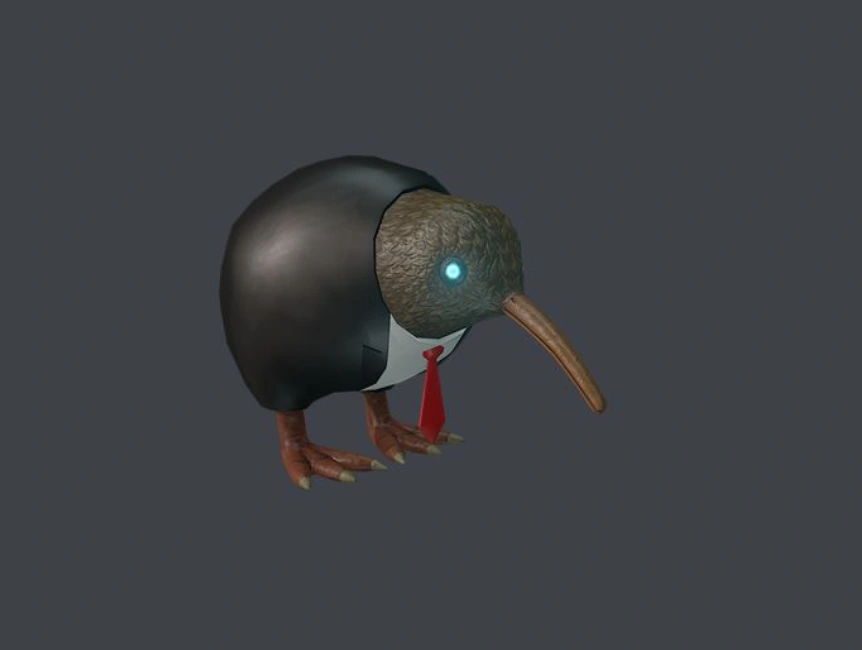
Complete all the Thriller Night challenges:
|
|
| Hitman of the Black Lagoon | TN |
Eliminate a target by pushing or dumping them into the pool. | +2000XP |


All of these were cut in HITMAN™ III.
Mastery
| Mastery Level | Type | Unlock | Description |
|---|---|---|---|
| 1 | Starting Location |
Boat | 47 has arrived at Hawke's Bay by boat, a good walking distance from the house. |
| 2 | Hidden Stash |
Garbage Container | The ICA can conceal a small item inside a garbage container behind the house. |
| Explosive |
ICA Proximity Explosive Mk II | A modular explosive device designed by the ICA. Detonated by proximity. Exercise caution when placing. Highly suspicious if noticed. It also has the signature Mk II look. | |
| 3 | Starting Location |
Beach | 47 arrived at Hawke's Bay, on the beach near the house. |
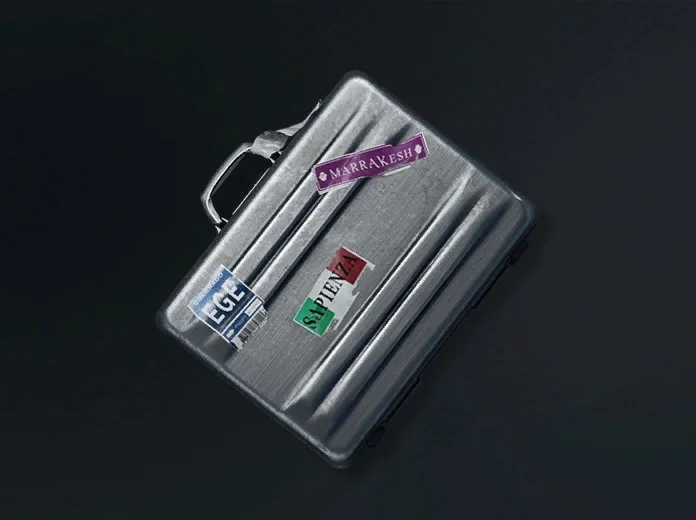
| 4 | Agency Pickup |
Beach Shack | The ICA can smuggle a briefcase containing a large item inside of an old boat house on the beach. |
| 5 | Starting Location |
Office | 47 has infiltrated the house in Hawke's Bay and starts inside the office. |
| Explosive |
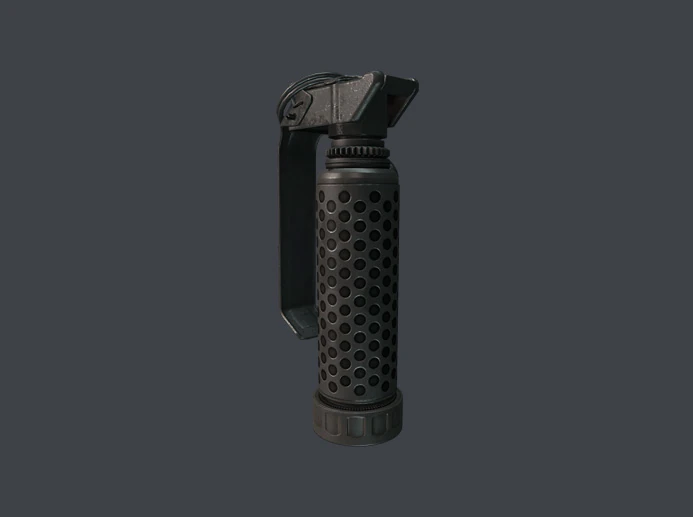
Flash Grenade | A flash grenade. Can be thrown and detonate in a bright flash after a small delay. Will blind anyone nearby. | |
| Melee |
Tanto | A very sharp short blade. Used by samurais to perform seppuku [HITMAN™ III only]. |


Disguises
")
")
Items


Other NPCs
- Orson Mills - CICADA Mercenary and Alma Reynards lover
- Gerard Mann - Head of Security and Personal Bodyguard of Reynard and Mills.
Gallery
")
")
")
")
Mission Map

The full interactive map for this mission can be viewed via HITMAPS by clicking the image or clicking here.
Escalation Contracts
There is currently one Escalation Contract available in Hawke's Bay:
")
.png)
.png)
Elusive Targets
This is the list of the Elusive Targets that appeared in Hawke's Bay, with reactivations occuring during HITMAN™ 2 & HITMAN™ III.
")
Target Lockdown
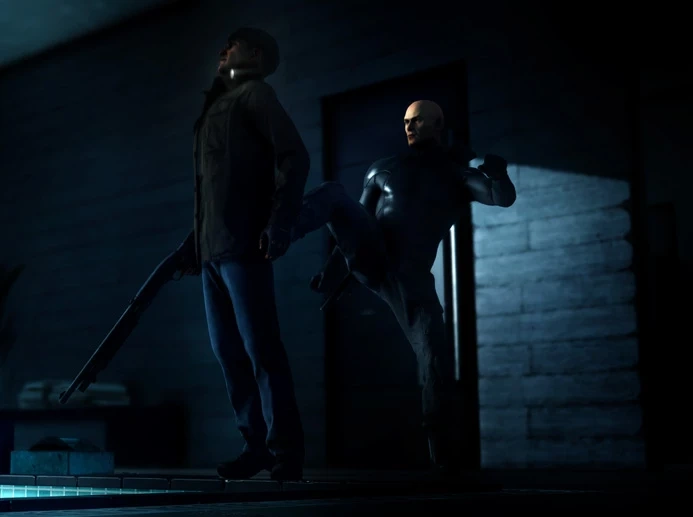
Alma Reynard has a safe room on the second floor, hidden behind the wall in her office. She will run there during an emergency with Orson. When this happens, the safe room is locked and cannot be accessed from either the office with the computer (whose painting opens the secret door) or the garage where the safe room's second door opens. Players can circumvent this at any time by destroying the safe room's hatch on the roof. If the safe room is breached or discovered by the player, she will run into the sea and commit suicide. In some cases, Alma Reynard will run to the truck where the grave is being dug and huddle by the mercenaries there; while other times, Alma Reynard will run to the edge of the water but remain alive, perhaps due to a deviation in her functions after the safe room being discovered. The player can kill her if they manage to get close enough by hiding in vegetation and shooting her from a distance or by rushing and pacifying her. In any case, it seems that repeatedly causing disturbances is enough to eventually frighten her into drowning herself.
Trivia
- There are a total of 34 non-target NPCs in this mission. Of these, only Orson Mills is a non-combatant civilian.
- This level has the least amount of non-target NPCs in the World of Assassination trilogy, as well as the least number of civilians.
- The challenge "Sugar, Honey, Honey" takes its name from the 1969 "bubblegum pop" song by the Archies.
- The developers revealed that originally Alma's appearance and attire were much sexier. Later they changed it to avoid Agent 47 looking like a sexual predator.
- If Alma and Orson head to sleep, Alma will eventually wake up after 15 minutes to call her sister Celia and apologise for missing her daughter Mercedes's birthday, who is currently living with Celia.
- One of Alma's guards was apparently at the militia compound during Freedom Fighters. He can be overheard still being unnerved by how someone could infiltrate a fortified compound and kill four highly trained operatives without raising any alarm or leaving any trace.
- Max, Reynard's large and dangerous dog which lives in the beach house, is repeatedly referred to in NPC dialogue, and will sometimes be blamed for unknown sounds or damage caused by the player. Despite repeated references to his vicious nature, the dog itself never appears.
- Although conversations regularly may seem friendly, Alma and Orson often scold Gerard to tears when mistakes such as naked disarmed guards or randomly placed weapons occur. He will also be scolded if he is caught vomiting in the top floor bathroom via rat poison in the ventilation.
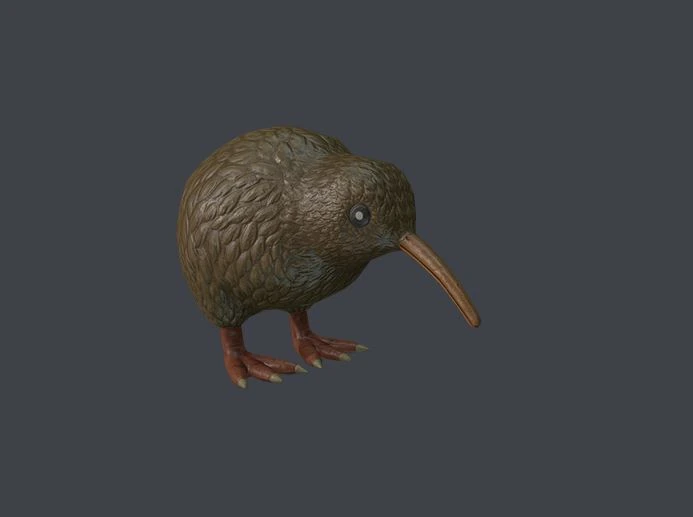
- Nightcall is the first mission in the Hitman franchise to take place in the continent of Oceania. It is also one of three missions in the Hitman franchise known to take place in the Southern Hemisphere, along with The Farewell and A Vintage Year.
- Alma's bodyguards will remain on high alert if anyone in the mission is alerted. This is one of three levels where this can be happen, the other two being The Showstopper in HITMAN™ and End of an Era in HITMAN™ III.
- In HITMAN™ III, WB GAMES PRESENTS and AN IO INTERACTIVE GAME are replaced with IO INTERACTIVE PRESENTS, due to IO Interactive being the publisher of these games.
- Alma drowning herself in the ocean is likely a reference to the ending of the 2011 movie "Drive" in which the character Nino (Ron Perlman) attempts to flee into the ocean from the protagonist (Ryan Gosling). The mission also shares its name with the 2011 song "Nightcall" by Kavinsky used in the opening of Drive.